Monday, January 14, 2013

Roast Chicken Dinner

Chicken 1-14-13 (22)

OMG!!  This chicken dinner is so good!  And your house will smell wonderful after you make it!

This is the second time I've made this, and each time it has turned out fantastic.  I mixed together several recipes and this works really well.  You must try this.

Here's what you need:
  • 1 (5-6 pound) chicken.  I think I'll try a larger bird next time - we don't have any leftovers!
  • 1 stick of butter
  • 1 tsp lemon pepper seasoning
  • 1 tsp poultry seasoning (or sage if you don't have that)
  • 1 large lemon
  • 1 full head of garlic, peeled and separated
  • Small potatoes
  • baby carrots
  • 2 onions
  • The first time I made this I had broccoli on hand and I added it to the veggie mix.  You can add/subtract what works for you
  • Olive oil
  • Salt (kosher please)
  • Pepper


First - take a picture of your sleeping cat, and then wake him up because you'd like to take a nap too, and if you can't take a nap then neither should he.

Chicken 1-14-13 (2)

Second - gather some of your ingredients!

Chicken 1-14-13 (4)

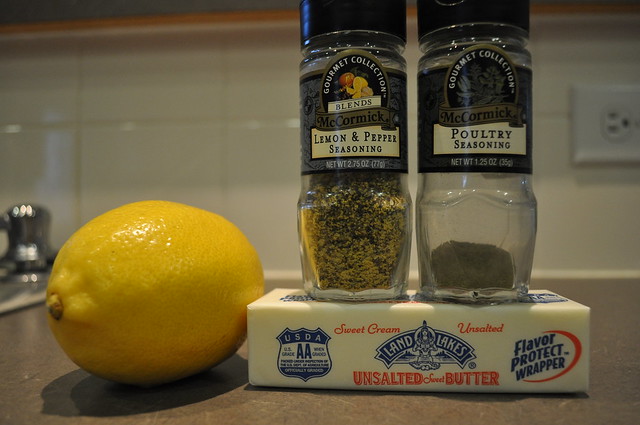
Please pretend you see 1 clove of freshly peeled garlic in the picture above too.

Now, melt your stick of butter and then mix in the lemon pepper and poultry seasonings.  Using a fine grater, grate the lemon peel into the butter mixture.  Run the garlic clove through a garlic press (or chop very finely) and add to butter mixture.  Put this in the fridge to chill and harden up.  It will take much less time than you think for this to occur.

Your butter mixture should look like this (before being chilled) - not very appealing, but tasty.

Chicken 1-14-13 (10)

Time to prep your veggies.  This time I selected potatoes, carrots, garlic and onions, but in the past I have also added broccoli.  Use what you like!

Chicken 1-14-13 (11)

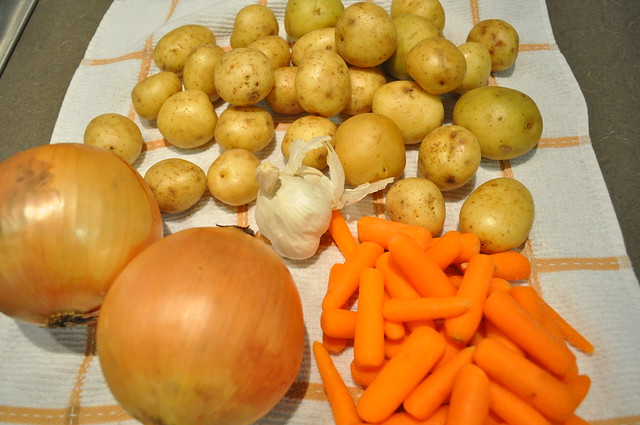
I wash and slice up everything (peel the garlic and leave it whole) and then put all of your veggies into a plastic bag.   Drizzle in some olive oil - just enough to coat the veggies.  Mix the veggies around so that everything is covered.

Chicken 1-14-13 (16)

Cover your pan with foil (it makes clean up so much easier - and I'm all about making things easier).  Rinse and dry the chicken, and make sure you take out any nasty foreign things that they put inside the chicken.  Put the chicken in the middle of your pan.

Preheat your oven to 425 degrees.  Yes, that's right - 425.  Oh, and before you do that, check your oven to see if you need to lower a rack down a bit to fit the chicken in.

Take your butter mixture out of the fridge and work some of it between the breast and skin of the chicken with your fingers - it's messy but worth it.  Try not to break the skin when you do this.  Put some inside the chicken as well, and then "coat" the top of the chicken with the remaining bits of the butter mixture. 

Slice your lemon into about 4 chunks and squeeze some juice over the veggies in the bag.  Then put the lemon (peel and all) and onions inside the chicken.  Put as much in there as you can fit.

Take your veggie mixture out of your bag and spread your veggies around the chicken.  Sprinkle with kosher salt and pepper. 

Chicken 1-14-13 (19)

Bake the chicken, just like this -not covered - for 1 1/2 hours.  I take it out half way through and stir the veggies around. 

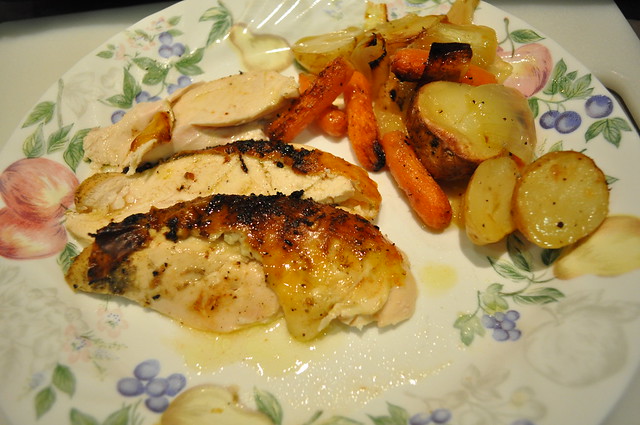
You can test the chicken for doneness by making sure the juices run clear or with a thermometer.  After you pull it out of the oven, tent the entire thing for about 10 minutes and then slice and serve.

Chicken 1-14-13 (22)

The veggies soak up the chicken juices and the onions and garlic flavor everything. 

The cooked whole garlic cloves are extra special treats - they get very soft and are super tasty.  Smear them on the potatoes or a piece of chicken for extra goodness.

Chicken 1-14-13 (27)

Please try this sometime - it really is quite good.

Enjoy!

Monday, January 7, 2013

Multigrain Bread - Single Loaf

Bread (38)

I think my most popular recipe on my blog is the multigrain bread recipe.  It is an excellent recipe and pretty much fail-proof. 

I even made a cinnamon swirl version of this bread as well.  Yummy!

My only issue with the recipe was that it made two loaves.  That might not be a concern for most people because I have found this bread freezes very well.  Just eat one loaf and then freeze the other.

However, my family is goofy.  If they know it's been frozen, they won't eat it.  And I like to bake each weekend, so I was getting really stocked up on bread.  My neighbors are on a eat healthy, lose weight plan for the new year, so I can't send the extra loaf to them.  I needed a way to cut this recipe down to one loaf.  I'd been scared to try it until now - because I had always been told baking was very precise and you can't change the recipes. 

I am not a precise cook.  I do not like to be told what to do.  I am very onry honry ornery that way.  How dare a recipe tell me what to do!

And can I just tell you how long it took me to figure out how to spell ornery?  I am a terrible speller, and it's very difficult to look up a word to figure out how to spell it when you don't even have a clue as to where to start.

Anyway - I adjusted the original recipe and it worked just perfectly.  Here's the new measurements. 

You can follow them, or not.  I'm not going to be the one to tell you what to do. 

  • 2/3 cup of 7-grain hot cereal mix
  • 1 1/4 cup of boiling water
  • 1 1/2 cup unbleached all-purpose flour
  • 3/4 cup whole wheat flour (or whole wheat white flour)
  • 4 Tbsp honey
  • 2 Tbsp butter, melted
  • 1 1/4 tsp instant yeast
  • 1 1/2 tsp kosher salt
  • 1//4 cup old-fashioned rolled oats
If you have any questions about what the hot cereal mix looks like, or the yeast I used, check the original version of the recipe here.  There are pictures of those items in that post.

Let's get started making bread, shall we? Put you cereal in the KitchenAid mixer and pour the boiling water over it. Stir it up and let it rest until the mixer cools to 100 degrees - or about 45 minutes to 1 hour later. The cereal should have soaked up most of the water - like this:

Bread (2)

Then add the honey, butter and yeast.

Now, with your bread hook, add the flours (your supposed to whisk them together first, but I never do this). Knead (using the KitchenAid mixer and the bread hook silly!  I don't want you to have to actually knead) until dough forms a ball, about 2 minutes. Cover and let the dough rest for 20-30 minutes (I just take the bread hook off and let it sit in the bowl with the dough and cover the entire bowl).

Then (using the mixer again) mix in the salt and then let the mixer run for about 2-3 minutes again.  You might need to add a bit more flour so that the dough doesn't stick.  The day I made this loaf was the first day I didn't have to add any extra flour at all though. 

Place dough in a greased container and cover with plastic wrap. Allow to rise until doubled, 45 minutes to an hour. My house is always so cold (on purpose) that I will often turn on my oven, and then turn it off after 1 minute and put the bread in there.

Here's the dough in my greased container before it has rested for 1 hour.
Bread (5)

And here it is after an hour.


Bread (6)

Spray your 9 x 5 inch loaf pan with Pam.

You are supposed to take your dough to a floured surface and flatten dough into a rectangle shape, and then roll it into a log.  Silly recipe - you are not the boss of me!

I, being the lazy person that I am, the one who doesn't want to have to clean a floured surface later on, have figured out a way to skip this step too. I work with the dough in the air - stretching it out - the way you would handle pizza dough. When I have a rectangle shape about the same size as my loaf pan, I roll it up tightly. I then take that dough and roll it around in the oats and then put this in the loaf pan.

This time I had my daughter Bailey take pictures of how I stretch the dough so you could see what I do.
Bread (8)

Action shots!
Bread (9)

Just let the weight of the dough help stretch it out.

Bread (14)

Here I'm rolling it into the general loaf form. Try not to get any air between the layers, they will make holes in the finished loaf.Bread (20)

Once you have your finished loaf shape, roll the loaf into the oats. Bread (23)

Be sure to have a nice manicure prior to taking pictures please (unlike me).

Bread (30)

Here's the finished loaf - ready to rise for another hour.

Bread (34)

Cover the pan lightly with plastic wrap and allow to rise another 45 minutes to 1 hour.

After the dough has risen, preheat the oven to 375 and bake for about 30-40 minutes. My oven takes about 32 minutes.

Remove the loaf from the pan and allow to cool, and sit back and be so impressed with yourself because your house smells so wonderful

and

YOU MADE BREAD!

Bread (38)

Bread (42)

Enjoy!